Design Your Community Hub
This lesson challenges learners to think like community leaders, designing a shared space that serves diverse needs. They'll explore what makes a community thrive and use everyday materials to bring their vision to life.
Our goal: In this spark, your learner will analyze diverse community needs for a shared public space, develop a physical design for a community space using limited resources and explain how design choices balance conflicting needs and promote community well-being.
What You Need
Paper • Scissors • Glue Or Tape • Small Blocks • Small Blocks/Caps
and this is just the baseline.
Scan to jump into the app and easily personalize this Spark to match your child's exact learning level and see how Mai will guide this lesson.
Learning Guide
A simple guide to lead you through the kickoff, the core challenge, and everything in between.
Mai’s Tips
- Encourage the learner to think about specific people they know in the community (e.g., 'What would your friend who loves art enjoy here?', 'How about your grandparents?'). This personalizes the needs.
- During the building phase, focus on process over perfection. The goal is to articulate ideas through a physical model, not to create a polished masterpiece. Celebrate creative problem-solving.
Prep Before Session 15 min
- Gather various paper types (plain, colored, construction paper).
- Collect scissors, glue, and tape.
- Find a collection of small objects for model building, such as bottle caps, Lego bricks, buttons, or small blocks.
- Clear a table or floor space for sketching and building the model.
1Introduction 5 min
Begin by inviting your learner to imagine a new gathering place in your neighborhood, a 'Community Hub.' This is a central place where diverse people gather, learn, relax, and connect; it's important because it fosters connection and well-being. Ask them to reflect on existing public spaces they enjoy. Use these guiding questions: 'What are some of your favorite public places in our neighborhood or town?' 'What makes those places special for you?' 'How do you think those places work well for different kinds of people?' Encourage them to articulate how these spaces serve various community members. Once they've shared initial thoughts on public spaces and what makes them special, you're ready to move on.
Know Before You Teach
- Good to know: Community hubs are central places designed to bring people together from different backgrounds and with various interests.
- Effective public spaces consider the diverse needs of people of all ages and abilities to ensure they are welcoming and useful for everyone.
- If they ask: Why do we need a new hub if we already have parks and libraries? A hub often combines many different functions and services under one roof, or in a specific central area, offering something for almost everyone in a single place.
- It's working when: The child names different types of public places (e.g., library, park, community center, playground, local cafe) and explains what they like about them.
- If they're stuck: Show pictures of different types of successful community centers or lively public squares from other towns or countries to spark ideas.
- Easier: Provide 2-3 specific examples of public spaces, like a local park, the library, and a community pool, and ask them to pick their favorite and explain why.
- Harder: Ask them to identify a public space in your town that doesn't work well for people and explain what they would change about it.
Done when: Student shares initial thoughts on public spaces and what makes them special.

2Explore & Plan 8 min
Shift focus to becoming 'community needs experts.' A 'Preliminary Layout' is a rough, initial sketch showing the basic arrangement of different areas or features. Guide your learner in brainstorming the 'Diverse Needs' of different community members – the varied requirements and preferences of people, from kids to elders, important so everyone feels welcome. Ask: 'What different kinds of people live in our community?' 'What might each of these groups need or want in a shared space?' Once a list of needs is generated, help them start sketching a preliminary layout of their community hub on paper. You are done when they have a list of identified community needs and a preliminary sketch or plan.
Know Before You Teach
- Good to know: A preliminary layout is an initial, rough sketch intended to quickly capture and arrange ideas, not to be a perfect or final drawing.
- If they ask: What if someone wants something really unusual or specific? It's important to list all ideas, and later we can discuss how common the need might be or if there are creative ways to incorporate it.
- If they ask: Do we have to include something for everyone? The goal is to aim for as many as possible, understanding that perfect solutions for absolutely everyone are very hard, but we should try our best.
- It's working when: The child lists various groups of people (e.g., toddlers, teenagers, older adults, people with pets) and identifies at least one specific need or desire for each group.
- If they're stuck: Suggest thinking about specific family members or friends (e.g., 'What would Aunt Maria enjoy here?' or 'What about your cousin Leo?') to prompt ideas for diverse needs.
- Easier: Suggest specific types of areas for their hub, such as 'Do you want a quiet reading nook, a noisy game room, or a space for making art?'
- Harder: Ask them to consider not just individual needs, but also how different areas could interact or overlap to create new connections or save space.
Done when: Student has a list of identified community needs and a preliminary sketch or plan for their hub.

3Discussion 6 min
Acknowledge the fantastic ideas brainstormed. Now, guide a discussion around potential 'Conflicting Needs' – when desires like quiet versus loud clash, which is important to address for creative solutions. Also, focus on 'Inclusivity' – the practice of ensuring all feel welcome and have equal access, crucial for a thriving hub. Ask: 'Did you notice any needs or features that might be tricky to fit into one space?' 'How could a quiet reading area exist peacefully next to a bustling playground?' 'Who might feel left out if we only included features for one group?' The goal is for your learner to articulate potential design challenges and discuss creative ways to address them for inclusivity.
Know Before You Teach
- Good to know: Different groups within a community may have needs that appear to conflict, such as the desire for a very quiet area and a very loud activity space.
- Ensuring inclusivity means proactively considering who might feel unwelcome or left out and then designing solutions to make sure everyone feels they belong and can participate.
- If they ask: Why can't we just focus on one main thing, like a big sports complex? While a sports complex is great for some, a true community hub aims to be a gathering place that serves a broader range of interests and people, not just one specific activity.
- If they ask: What's the difference between 'fair' and 'inclusive'? Fairness means everyone gets what they need, but inclusivity goes a step further by ensuring that everyone also feels genuinely welcome, respected, and able to participate fully in the space.
- It's working when: The child identifies at least one potential conflict between features (e.g., a quiet study area near a lively playground) and suggests a possible design solution.
- If they're stuck: Point to two different areas on their preliminary sketch and ask, 'If someone was using this quiet area, how would they feel about the noise from this active zone right next to it?'
- Easier: Present two clearly conflicting ideas (e.g., 'a loud concert area' versus 'a peaceful meditation garden') and ask them how both could fit into the same general space.
- Harder: Ask them to prioritize three different needs for their hub and explain their reasoning for why those three are the most critical to address first.
Done when: Student articulates potential design challenges and discusses ways to address them for inclusivity.

4Activity 9 min
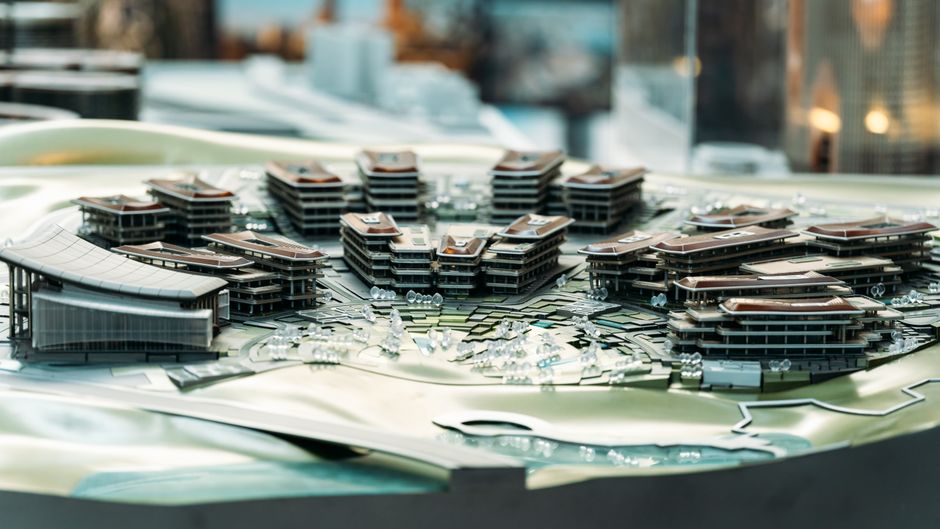
It's time to build! Your learner will create a 'Physical Model' – a smaller, three-dimensional representation of their design, which helps visualize ideas. Gather the materials: Paper, Scissors, Glue/Tape, and Small Blocks/Caps (substitutes include bottle caps, Legos, building bricks, or buttons). Ensure the learner leads the design and construction. They can cut shapes from paper for buildings, green areas, and pathways. Use small objects to represent specific features. Offer support, helping with cutting or holding pieces, but all creative decisions should be theirs. The stage is complete when your learner has finished a physical model or layout of their community space.
Know Before You Teach
- Good to know: Building a physical model helps visualize ideas in three dimensions, revealing spatial relationships and potential problems that might not be obvious in a 2D drawing.
- Designers often use everyday, inexpensive materials for models to quickly test and refine concepts before committing to more complex or costly plans.
- The purpose of this model is to represent the idea of the space, its layout, and its functions, not to create a perfectly detailed or realistic replica.
- If they ask: What if I don't have enough of the exact right materials for something? Encourage creative substitution or abstraction; for example, a green paper square can represent a park, or a stack of bottle caps can be a tall building.
- It's working when: The child actively manipulates materials to represent different zones, structures, or features from their sketch, showing how they fit together in a 3D space.
- If they're stuck: Suggest starting with the largest or most central feature of their design and then building outwards, adding smaller elements around it.
- Easier: Provide a baseboard with pre-drawn outlines of different functional areas (e.g., 'play zone,' 'quiet zone') to guide their placement of model elements.
- Harder: Challenge them to incorporate an element with a moving part or a modular design that can be rearranged to show different uses for the same space.
Done when: Student has completed a physical model or layout of their community space.
5Summary 2 min
Celebrate your learner's incredible community hub design! Now, reflect on the process. A 'Thriving Community' is one that is successful, growing, and connected, the ultimate goal of good planning. Ask them to reflect with these questions: 'What was the most challenging part of designing a space for so many different people?' 'What surprised you during this design process?' 'If you could share one big lesson from this challenge, what would it be about building a thriving community?' Your learner has completed this stage when they share one key takeaway from the design process and their reflection.
Know Before You Teach
- Good to know: Designing a successful community space involves balancing many different perspectives, practical limitations, and creative problem-solving.
- Reflecting on a project helps reinforce what was learned and allows for personal growth in understanding complex issues like community planning.
- A thriving community is ultimately supported by spaces that are thoughtfully designed to meet diverse needs, encourage positive interactions, and make everyone feel valued.
- If they ask: Is this how real architects or city planners work? Yes, real professionals go through very similar steps of brainstorming needs, sketching layouts, creating models, and refining designs based on feedback from the community.
- If they ask: What happens if a community hub isn't well-designed? If a hub isn't well-designed, it might be underused, only serve a small portion of the community, or even create new problems like noise or accessibility issues.
- It's working when: The child articulates a specific insight or realization about the complexity of community design, rather than just summarizing their actions during the activity.
- If they're stuck: Rephrase one of the reflection questions, perhaps connecting it directly to their model: 'Looking at your design, what was the most surprising challenge you faced when trying to make these two different areas work together?'
- Easier: Ask them to simply name one thing they really enjoyed or one new thing they learned while designing their community hub.
- Harder: Ask them to identify one specific element of their design that they believe would be most impactful for fostering connection and explain why that particular feature is so important.
Done when: Student shares one key takeaway from the design process and reflection.
Beyond The Spark
Fuel their curiosity beyond the Spark with bonus extras.
Table Talk
Community planners and urban designers use similar processes to create public spaces that serve millions of people.
Challenge
Now, imagine you only have half the space you designed, but still need to include all the essential elements. How would you redesign it? Or, design a small budget proposal for one key feature, explaining its cost and benefit.
Quick Recap Quiz 4 min
Customize this quiz, add questions, or follow your child's lead! Each question has a 'Parent Tip' to help them find the answer without giving it away.
1. What is the primary goal when designing a community space?
- Make it as profitable as possible.
- Meet the diverse needs of many people.
Remind them about considering 'everyone' and 'different needs' during the planning.
2. Why is it important to consider different age groups when planning a community hub?
- Different age groups have different needs and interests.
- It makes the design more complicated.
Ask: 'Would a toddler and a teenager want the same things in a park?'
3. If a community space has both a quiet library area and a noisy playground, what's a good design strategy?
- Put them right next to each other to save space.
- Separate them with a buffer zone like a garden or path.
Think about how physical barriers or distance can help different activities coexist.
4. What's a key benefit of having community members participate in designing public spaces?
- It helps ensure the space is truly useful and welcoming for them.
- It slows down the building process.
Connect back to the 'why' of their design challenge – making it work for real people.
Loved This Spark?
Scan to jump into the app and explore similar Sparks in our Sparks Hub. New to Mai? Start free with 10 Sparks, no credit card needed.