
Clean Water Challenge
This lesson challenges learners to design and construct a multi-layer water filter using common household materials. They will investigate how different materials can remove impurities from water, connecting scientific principles to real-world applications.
Our goal: In this spark, your learner will design a functional multi-layer water filtration system, explain how different materials contribute to water purification and evaluate the effectiveness of a homemade water filter.
What You Need
Empty Plastic Bottle • Cloth Scraps • Sand • Small Pebbles • Soil/Dirt • Water • Paper • Drawing Tool • Scissors • Pitcher
and this is just the baseline.
Scan to jump into the app and easily personalize this Spark to match your child's exact learning level and see how Mai will guide this lesson.
Learning Guide
A simple guide to lead you through the kickoff, the core challenge, and everything in between.
Mai’s Tips
- Encourage your learner to take photos or draw observations at different stages of the filtration process. Documenting helps solidify learning!
- Remind your learner that water filtered this way might look clean, but it's not safe to drink without further purification (like boiling) because it doesn't remove microscopic bacteria or dissolved chemicals.
Prep Before Session 5 min
- Gather one empty 2-liter plastic bottle, cloth scraps, sand, small pebbles, paper, and a drawing tool.
- Collect about a cup of soil/dirt and ensure access to tap water and a pitcher for mixing.
- Have a pair of scissors or a craft knife ready for cutting the bottle during the lesson.
1Introduction 5 min
Begin by discussing the importance of clean water in daily life. Encourage your child to think broadly about sources of water pollution, both natural and human-made. Introduce the concept of water filtration, explaining that it's the process of removing impurities to make water cleaner.
Ask them:
"Can you imagine a situation where getting clean water isn't as simple as turning on a tap?"
"What kinds of things might make water 'dirty' or unsafe?"
"Why is it so important to remove those things from our water?"
Explain that the filter they'll build today uses physical filtration, which means materials physically block and catch dirt, but it won't remove tiny germs or chemicals. They'll learn more about this in later stages.
This stage is complete when your child identifies at least two reasons water might be dirty and can explain why clean water is essential.
Know Before You Teach
- Good to know: Water pollution can come from natural sources like volcanic ash or soil erosion, and human-made sources such as industrial waste or litter.
- Physical filtration works by using materials with tiny holes or spaces to block larger particles, but it cannot remove dissolved substances or microscopic organisms like bacteria.
- Access to clean water is a global issue, affecting health, agriculture, and daily life in many parts of the world, not just in emergency situations.
- If they ask: What's the difference between 'dirty' water and 'polluted' water? Dirty water often just means it has visible stuff in it, while polluted water contains harmful substances you might not see, like chemicals or bacteria.
- If they ask: Are there different kinds of filtration? Yes, besides physical filtration, there's chemical filtration that removes dissolved substances, and biological filtration that uses living organisms to break down pollutants.
- Key words: water pollution: Harmful substances or materials that make water unsafe or unusable for living things.
- Key words: water filtration: The process of removing unwanted substances or impurities from water.
- Key words: physical filtration: A type of filtration where solid particles are removed from water by being trapped in a material they cannot pass through.
- If they're stuck: Show a picture of a polluted river or a water-deprived community to spark discussion about water sources.
- Easier: Focus only on visible dirt and why it's bad to drink, skipping the distinction between physical, chemical, and biological filtration.
- Harder: Ask them to research a specific current event or historical example where clean water access was a major challenge.
Done when: Student identifies at least two reasons water might be dirty and why clean water is essential.

2Explore & Plan 8 min
Help your child gather the materials needed: an empty plastic bottle, cloth scraps, sand, small pebbles, soil/dirt, water, paper, and a drawing tool. Supervise as you cut the plastic bottle in half to create a funnel shape with the top part.
Then, guide them to brainstorm how different materials can help. Ask them:
"What 'things' might we find in dirty water that we want to filter out?"
"How might materials like sand, pebbles, or cloth help us 'catch' those different things?"
Encourage them to sketch their initial filter design on the paper, showing the layers. Remind them there's no 'wrong' way to start.
This stage is complete when your child has a basic filter design sketched out and can explain the purpose of at least two different layers.
Know Before You Teach
- Good to know: Different filter materials are effective at trapping different sizes of particles; larger particles are typically removed first, then progressively smaller ones.
- Gravity helps pull water through the filter layers, with each layer providing resistance and trapping specific impurities.
- If they ask: Does the order of the layers matter? Yes, usually you want to put the largest filtering materials at the top to catch big stuff first, then gradually finer materials to catch smaller particles.
- If they ask: Can I use [another household item]? That's a great idea; think about if it has small holes, if it's absorbent, or if it could trap particles, and how it might fit into your design.
- It's working when: Child points to a sketched layer and explains what it's supposed to block (e.g., 'sand will get the tiny bits').
- If they're stuck: Suggest holding up a small pebble and a pinch of sand, asking which would block bigger things and which smaller things.
- Easier: Provide pre-labeled containers for each material and suggest a fixed order for layering them.
- Harder: Challenge them to justify their material choices and order based on particle size and material properties in a mini-presentation.
Done when: Student has a basic filter design sketched out and can explain the purpose of at least two different layers.

3Discussion 6 min
Now, it's time to predict the outcome! Allow your child to articulate their predictions about the filter's performance and their reasoning.
Ask them:
"What do you predict will happen when you pour dirty water through your filter?"
"Do you think the water will come out perfectly clear, or just clearer?"
"Why might some impurities be easier to remove than others?"
If they get stuck, gently prompt them to think about particle sizes or the absorbency of materials. The goal is critical thinking, not necessarily a 'correct' answer yet.
This stage is complete when your child clearly states their predictions for the filter's performance and explains their reasoning.
Know Before You Teach
- Good to know: Larger, heavier particles tend to settle out of water more easily, making them simpler to filter physically than very fine suspended particles.
- If they ask: Will my filter make the water drinkable? No, a homemade filter like this only removes visible dirt and some larger particles; it doesn't make water safe to drink because tiny germs can still pass through.
- If they ask: What's 'particle size'? Particle size refers to how big or small individual pieces of dirt or impurities are, which is important for knowing what kind of filter material can catch them.
- Key words: impurity: Anything in the water that isn't pure water, especially something unwanted or harmful.
- Key words: particle size: The measurement of how large or small a piece of matter is, which affects how easily it can be filtered.
- It's working when: Child describes specific expected changes (e.g., 'the mud will be trapped, but it might still be a little cloudy') and connects it to a material (e.g., 'the sand will stop the small dirt').
- If they're stuck: Ask, 'If you had a colander and a coffee filter, which would let bigger things through? Which is more like sand, and which is more like pebbles?'
- Easier: Provide options for predictions (e.g., 'Will it be A, perfectly clear, or B, a bit clearer?') and have them pick one.
- Harder: Ask them to quantify their prediction (e.g., 'On a scale of 1 to 10, how clear do you expect the water to be, and why?').
Done when: Student clearly states their predictions for the filter's performance and explains their reasoning.
4Activity 9 min
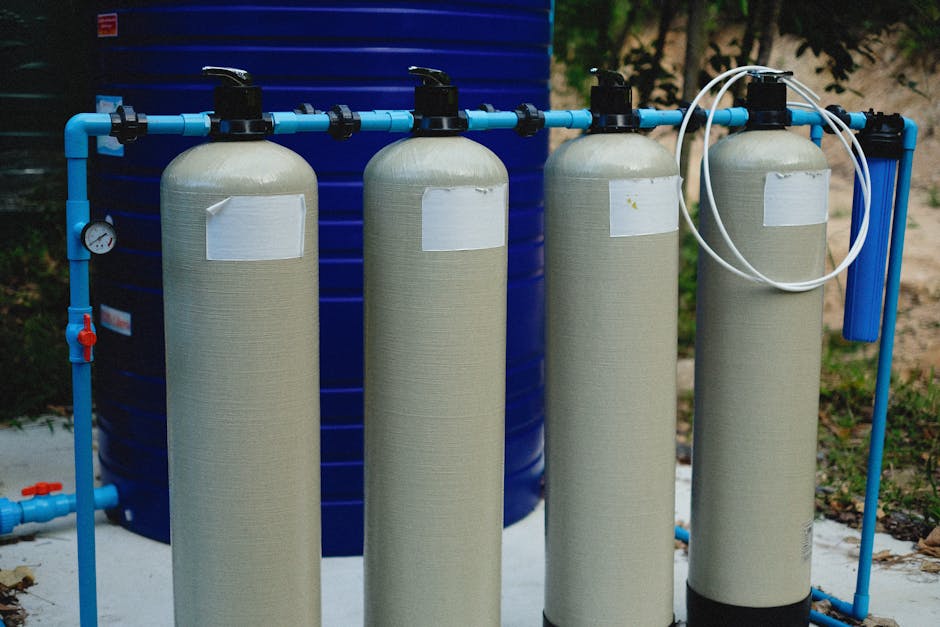
It's time to build and test! Carefully guide your child to assemble their filter. First, place the cloth scraps into the narrow opening (mouth) of the inverted top section of the plastic bottle. Then, layer the chosen materials (pebbles, sand) into this section, placing the largest particles (pebbles) at the bottom (closest to the cloth).
Secure the top section onto the bottom half of the bottle to catch the filtered water. Next, prepare your 'dirty water' by mixing soil/dirt with tap water in a separate pitcher. Slowly pour your 'dirty' water through the assembled filter.
Encourage careful observation. Ask them:
"What do you notice happening as the water passes through each layer?"
"Are there any layers that seem to be working better than others?"
This stage is complete when your child has built their water filter, tested it with dirty water, and observed the results.
Know Before You Teach
- Good to know: Even after passing through multiple physical layers, water may still contain very fine suspended particles or dissolved substances that are too small to be trapped.
- If they ask: Why is the water still cloudy? Some particles are so tiny that they can pass through the spaces in your filter materials, making the water still look a bit cloudy.
- If they ask: What if it's filtering too slowly? The water might be moving slowly if your layers are packed very tightly, or if a fine layer is getting clogged by too much dirt.
- Key words: suspended solids: Tiny pieces of solid material that are floating in water, making it appear cloudy or murky.
- It's working when: Child actively watches the water flow through layers and comments on how the water's appearance changes.
- If they're stuck: Point to a specific layer and ask what type of impurity they think it's currently trapping.
- Easier: Provide pre-layered filter materials and have them only add the dirty water and observe.
- Harder: Ask them to modify one layer (e.g., add more of one material, change its compaction) and re-test, comparing the results.
Done when: Student has built their water filter, tested it with dirty water, and observed the results.
5Summary 2 min
Praise your child's effort and perseverance in designing, building, and testing their water filter. This is a great time to reflect on their learning.
Ask them:
"What was the most challenging part of this experiment?"
"What surprised you the most about the results?"
"What would you do differently if you built another filter?"
"How might this help you understand real-world challenges people face in getting clean water?"
Remind them that water filtered this way might look clean, but it's not safe to drink without further purification (like boiling), because it doesn't remove microscopic bacteria or dissolved chemicals.
This stage is complete when your child shares one key learning or reflection from the activity.
Know Before You Teach
- Good to know: Real-world water treatment plants use multiple stages of filtration, chemical treatment, and disinfection to make water safe for drinking.
- This activity demonstrates the principle of physical separation, a fundamental concept in many environmental and industrial processes.
- Emergency water filtration methods are crucial in disaster zones or remote areas where clean water access is severely limited.
- If they ask: How do they get water perfectly clean in cities? City water systems use advanced filters, chemical treatments like chlorine, and sometimes UV light to kill germs and remove even the tiniest impurities, making it safe to drink.
- If they ask: What else can filters be used for? Filters are used in many places, like in cars to clean air, in coffee makers, in swimming pools, and even in your vacuum cleaner to trap dust.
- It's working when: Child can articulate one specific thing they learned or found surprising about the filtration process.
- If they're stuck: Ask them to describe their favorite part of the activity or what they found most interesting.
- Easier: Have them draw a 'before' and 'after' picture of the water and describe the difference in one word.
- Harder: Challenge them to brainstorm other materials they might add to improve the filter and explain why.
Done when: Student shares one key learning or reflection from the activity.
Beyond The Spark
Fuel their curiosity beyond the Spark with bonus extras.
Table Talk
Water filtration is a core principle in environmental engineering, disaster relief, and even everyday water treatment plants that provide clean drinking water to entire cities.
Challenge
Design a second filter with an additional material (e.g., activated charcoal from a pet store, or crushed, rinsed charcoal from burnt toast) and compare its effectiveness to your first filter. Does it remove more impurities, or perhaps even color?
Quick Recap Quiz 4 min
Customize this quiz, add questions, or follow your child's lead! Each question has a 'Parent Tip' to help them find the answer without giving it away.
1. What is the primary purpose of using multiple layers in a water filter?
- To make the filter look pretty.
- To remove different sizes of particles.
Hint: Think about what happens when you try to catch tiny things with a big net.
2. Which material in our filter would primarily stop the largest pieces of debris?
- Small pebbles
- Sand
Hint: Consider the size of the gaps in each material.
3. After physical filtration, is the water usually safe to drink immediately?
- Yes, it's completely purified.
- No, it might still contain bacteria or dissolved chemicals.
Hint: What can we see versus what we can't see in water?
4. Why is understanding water filtration important for real-world situations?
- It helps communities access clean water during emergencies or in developing areas.
- It's only useful for school science projects.
Hint: Think beyond the classroom – where might this skill be life-saving?
Loved This Spark?
Scan to jump into the app and explore similar Sparks in our Sparks Hub. New to Mai? Start free with 10 Sparks, no credit card needed.