
Build Your Cozy Fort
This lesson challenges young learners to plan, build, and enjoy their very own cozy fort using common household items. They will practice problem-solving and creativity while making a special place to relax.
Our goal: In this spark, your learner will plan a simple structure using available materials, construct a fort that can stand up and decorate a personal space for comfort and enjoyment.
What You Need
Blankets • Pillows • Chairs • Clothespins • Sofa • Boxes
and this is just the baseline.
Scan to jump into the app and easily personalize this Spark to match your child's exact learning level and see how Mai will guide this lesson.
Learning Guide
A simple guide to lead you through the kickoff, the core challenge, and everything in between.
Mai’s Tips
- Let your child lead the material selection and building process entirely. Resist the urge to 'fix' or improve their design unless it's a safety concern. The learning is in their independent problem-solving.
- Focus on the process, not just the finished product. Praise their perseverance, creativity, and critical thinking when they try new approaches, even if the fort isn't 'perfect'.
Prep Before Session 5 min
- Ensure a clear, open space in a room for fort building.
- Gather a variety of common household items such as blankets, pillows, cushions, chairs, a sofa, and maybe some clothespins or clips.
1Introduction 5 min
Welcome your child to the fort-building adventure. Encourage them to imagine their dream fort by verbalizing their initial ideas. Listen carefully and affirm their creativity without correcting or making suggestions. This helps them freely explore possibilities. Guiding questions to ask:
* "What kind of fort would make you feel super happy?"
* "What might it look like inside?"
Done when your child shares an initial idea for their fort.
Know Before You Teach
- Good to know: At this age, children's imaginations are very active, so encouraging them to verbalize ideas helps them process and solidify their thoughts.
- Allowing them to lead the idea generation without correction fosters creativity and a sense of ownership over the project.
- If they ask: Can my fort be a spaceship? Yes, it can be anything you imagine! How would a spaceship fort look?
- If they're stuck: Suggest thinking about a favorite storybook character's special place and ask what their fort might be like.
- Easier: Offer two very different ideas for forts, like 'Would you like a fort for hiding or a fort for reading?'
- Harder: Ask them to imagine what sounds or smells might be inside their dream fort.
Done when: Child shares an initial idea for their fort.

2Explore & Plan 8 min
Now, guide your child to explore the room for potential fort-building materials. Help them identify items that could serve as supports (like chairs or sofas) or coverings (like blankets and pillows). Ask open-ended questions to encourage their problem-solving. Guiding questions to ask:
* "What could you use to build a fort?"
* "What do you see that might help make walls or a roof?"
* "How could this [item they identify] help?"
* "What do you think this [item] could be?"
Done when your child has identified 2-3 items they want to use and has a basic idea of how they might use them.
Know Before You Teach
- Good to know: Learning to identify objects by their potential function (e.g., a chair as a support, a blanket as a wall) is a fundamental problem-solving skill.
- This stage helps children connect abstract ideas (like a fort) to concrete, available resources.
- If they ask: Can I use the dining table? The dining table is good for eating, but what about a chair or the sofa? Those are easier to build with.
- It's working when: The child pointing to an object and suggesting a specific use for it in the fort, such as 'This pillow can be a soft floor.'
- Easier: Place 3-4 potential fort-building items (e.g., 1 blanket, 2 pillows, 1 chair) directly in the fort-building area.
- Harder: Challenge them to find one item that could serve two different purposes in the fort, like a large box that's both a wall and a table.
Done when: Child has identified 2-3 items they want to use and has a basic idea of how they might use them.

3Discussion 6 min
Engage your child in a conversation about fort stability. Let them answer first, and if they get stuck, offer gentle guidance. Introduce the word 'stable'. Stable means strong and steady, so it won't fall down easily, just like a big tree with deep roots. An unstable fort might wobble or collapse. Guiding questions to ask:
* "If you use a chair, how will you make sure the blanket stays on top?"
* "What happens if you don't make the walls wide enough?"
* "What do you think is the most important part of making a fort that doesn't fall over?"
Done when your child shares their thoughts on how to make the fort stable and cozy.
Know Before You Teach
- Good to know: Understanding 'stable' is a basic introduction to engineering and physics concepts, even at a young age.
- Discussing potential problems before building encourages planning and critical thinking, reducing frustration during the construction phase.
- If they ask: What if it falls on me? That's why we're talking about how to make it strong and steady so it stays up.
- Key words: unstable: Unstable means wobbly and likely to fall, like a tower of blocks that is too tall.
- It's working when: The child using words like 'strong,' 'wobbly,' or 'tip over' when discussing their fort ideas.
- If they're stuck: Gently push on a lightweight blanket draped over a single chair and ask, 'What happened there? How could we make it stronger?'
- Easier: Focus the discussion only on how to keep the roof (blanket) from falling down.
Done when: Child shares their thoughts on how to make the fort stable and cozy.
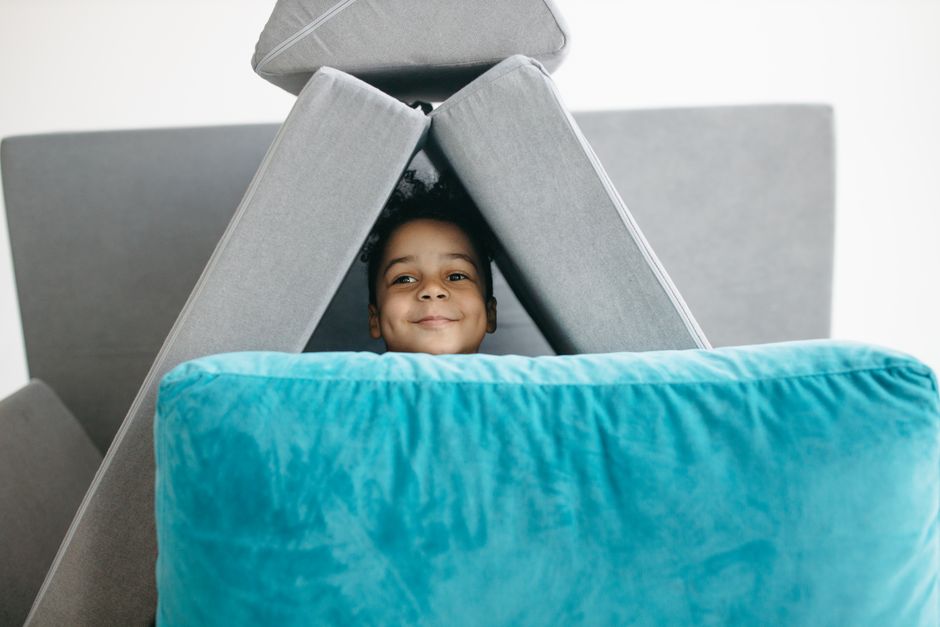
4Build Your Cozy Fort! 9 min
It's time to build! Gather blankets, pillows, chairs, clothespins, a sofa, or boxes. Supervise for safety, ensuring no climbing on unstable furniture. Encourage your child's perseverance. If the fort collapses, remind them, 'That's part of building, let's try a different way!' Avoid taking over the construction. Guide them to focus on making the fort stand up on its own and be a cozy space inside. Done when your student has constructed a fort structure and settled inside.
Know Before You Teach
- Good to know: Fort building is a hands-on experience that develops fine and gross motor skills as children manipulate objects and navigate their construction.
- The process of building often involves trial and error, which teaches resilience and adaptability.
- If they ask: My blanket keeps slipping! That can be tricky! What if we tried using a clothespin to hold it, or maybe tuck it under something heavy?
- It's working when: The child actively trying different ways to connect materials or arrange supports after an initial attempt doesn't work.
- If they're stuck: Suggest a specific action, like 'Try tucking that edge of the blanket under the cushion,' or 'Can you slide that chair a little closer to hold the blanket up?'
- Easier: Help them position the first two main support items (e.g., two chairs) to create a basic frame.
- Harder: Challenge them to create a fort with an entrance and a separate 'room' inside, even a small one.
Done when: Student has constructed a fort structure and settled inside.

5Summary 2 min
Celebrate your child's effort and ingenuity! Ask them to reflect on their fort-building journey and what they learned. Praise their creativity and determination shown throughout the activity. Guiding questions to ask:
* "How does it feel to be inside your very own special space?"
* "What was the trickiest part of building it, and how did you figure it out?"
* "What do you plan to do inside your new fort?"
* "What did you learn today?"
Done when your child shares one key takeaway from the activity.
Know Before You Teach
- Good to know: Reflection helps children connect their actions to outcomes, reinforcing learning about problem-solving and creativity.
- Articulating their experience also builds language skills and self-awareness.
- If they ask: Can I sleep in my fort tonight? It's so cozy, I can see why you'd want to! We can enjoy it for a while now, and maybe we can do a fort sleepover another time.
- It's working when: The child pointing to a specific part of the fort they are proud of or describing a particular challenge they overcame.
- If they're stuck: Ask, 'What was the most fun part about building your fort today?'
- Harder: Ask them to compare building this fort to building with blocks, and what was similar or different.
Done when: Student shares one key takeaway from the activity.
Beyond The Spark
Fuel their curiosity beyond the Spark with bonus extras.
Table Talk
Architects and engineers use these same skills to design and build houses and bridges that are strong and safe!
Challenge
Decorate your fort with drawings, stuffed animals, or a small lamp to make it extra special for reading or playing!
Quick Recap Quiz 4 min
Customize this quiz, add questions, or follow your child's lead! Each question has a 'Parent Tip' to help them find the answer without giving it away.
1. What did we mostly use to make the walls and roof of our fort?
- Blocks
- Blankets
Remind your child what they physically used to build the main structure.
2. What was important to make sure our fort didn't fall down?
- Making it strong
- Making it super tall
Ask, 'What happened if it wasn't strong?'
3. If a blanket kept sliding off, what could you try?
- Give up
- Try a different way
Remind your child about their own problem-solving during the activity.
4. Who else uses planning and building skills like you did today?
- Builders
- Singers
Connect back to the real-world example of people who design and make things.
Loved This Spark?
Scan to jump into the app and explore similar Sparks in our Sparks Hub. New to Mai? Start free with 10 Sparks, no credit card needed.